
Apache ActiveMQ is an free and open source message broker, Developed by: Apache Software Foundation, Written in C, C++, Java, Ruby, Perl, Python, PHP, C#.
Installing Java
sudo -i

apt-get update

apt-get install default-jdk -y
Get Java version
java -version
You should get output like this.
openjdk version "1.8.0_232"

OpenJDK Runtime Environment (build 1.8.0_232-8u232-b09-0ubuntu1~16.04.1-b09)OpenJDK 64-Bit Server VM (build 25.232-b09, mixed mode)
Downloading Apache Active-MQ
cd /tmp

wget -c "http://www.apache.org/dyn/closer.cgi?filename=/activemq/5.15.11/apache-activemq-5.15.11-bin.tar.gz&action=download" -O apache-activemq-5.15.11-bin.tar.gz
Extract Apache-activeMQ
tar xzf apache-activemq-5.15.11-bin.tar.gzRename the Apache-ActiveMQ
mv apache-activemq-5.15.11 /opt/activemqWe will create user and group named activemq that will be used to run ActiveMQ. Create the group first
groupadd activemq Create activemq system user and Updating permission.
useradd -s /bin/false -g activemq -d /opt/activemq activemqChange ownership of /opt/activemq directory to user activemq and group activemq.
cd /opt/activemq

chown -R activemq:activemq /opt/activemq

chmod -R 775 /opt/activemq
Configure ActiveMQ
cp /opt/activemq/bin/env /etc/default/activemqNow let’s start configuring ActiveMQ. Open /etc/default/activemq file.
nano /etc/default/activemq
# ACTIVEMQ_HOME="<Installationdir>/"

# ACTIVEMQ_BASE="$ACTIVEMQ_HOME"

# ACTIVEMQ_CONF="$ACTIVEMQ_BASE/conf"

# ACTIVEMQ_DATA="$ACTIVEMQ_BASE/data"

# ACTIVEMQ_TMP="$ACTIVEMQ_BASE/tmp"
Changes to
ACTIVEMQ_HOME="/opt/activemq/"

ACTIVEMQ_BASE="$ACTIVEMQ_HOME"

ACTIVEMQ_CONF="$ACTIVEMQ_BASE/conf"

ACTIVEMQ_DATA="$ACTIVEMQ_BASE/data"

ACTIVEMQ_TMP="$ACTIVEMQ_BASE/tmp"


ACTIVEMQ_USER="activemq"
Copy init script to /etc/init.d using command below:
cp /opt/activemq/bin/activemq /etc/init.dChange ownership of ActiveMQ init script to user and group root
chmod +x /etc/init.d/activemqNow let’s start ActiveMQ service using command below:
Controlling ActiveMQ daemon
To reload Apache ActiveMQ daemon use the following commands
systemctl daemon-reloadTo start the apache tomcat daemon use the following commands
systemctl start activemqTo status the apache tomcat daemon use the following commands
systemctl status activemqTo stop the apache tomcat daemon use the following commands
systemctl stop activemqTo enable on boot the apache tomcat daemon use the following commands
systemctl enable activemqTo disable on boot the apache tomcat daemon use the following commands
systemctl disable activemqFirewall Adjustment
By default, ActiveMQ working on port 8181 for Admin panel, You need to allow ports by following the commands.
ufw allow 8161Access the ActiveMQ Admin portal
You need to open the browser with
http://your_ip_OR_localhost:8161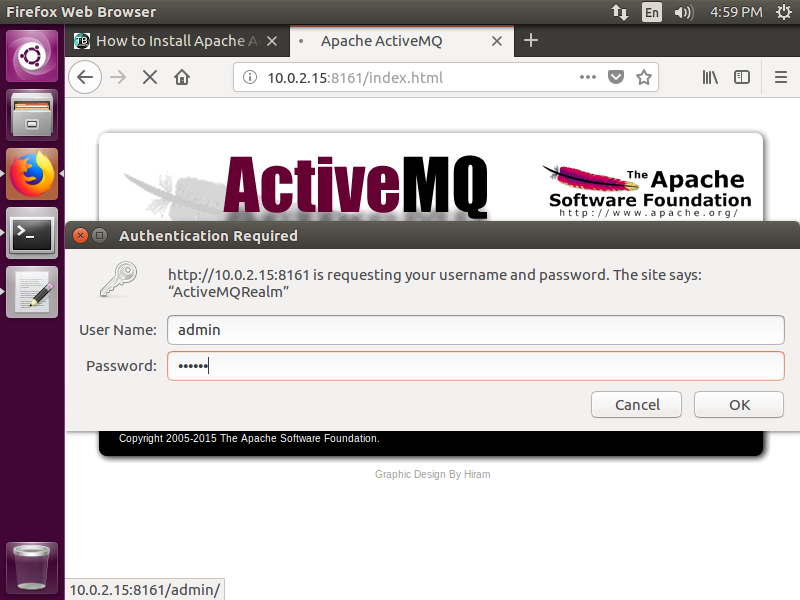
Now you need to put the username password, Username and password details are mentioned below :-
